
Creating Custom Behaviors
Behaviors are a versatile way to add interactivity to your experience. They’re often used to:
- Listen to the events emitted by a node and then perform an action, such as playing an animation or calling a function in a context.
- Change the behavior or properties of the node they’re attached to.
Creating a new Custom Behavior
Section titled “Creating a new Custom Behavior”Custom Behaviors extend behaviors by allowing you to customize the functionality to your project needs. They also allow you to affect more than one node at a time.
To add a new custom behavior to a specific node in your Mattercraft project:
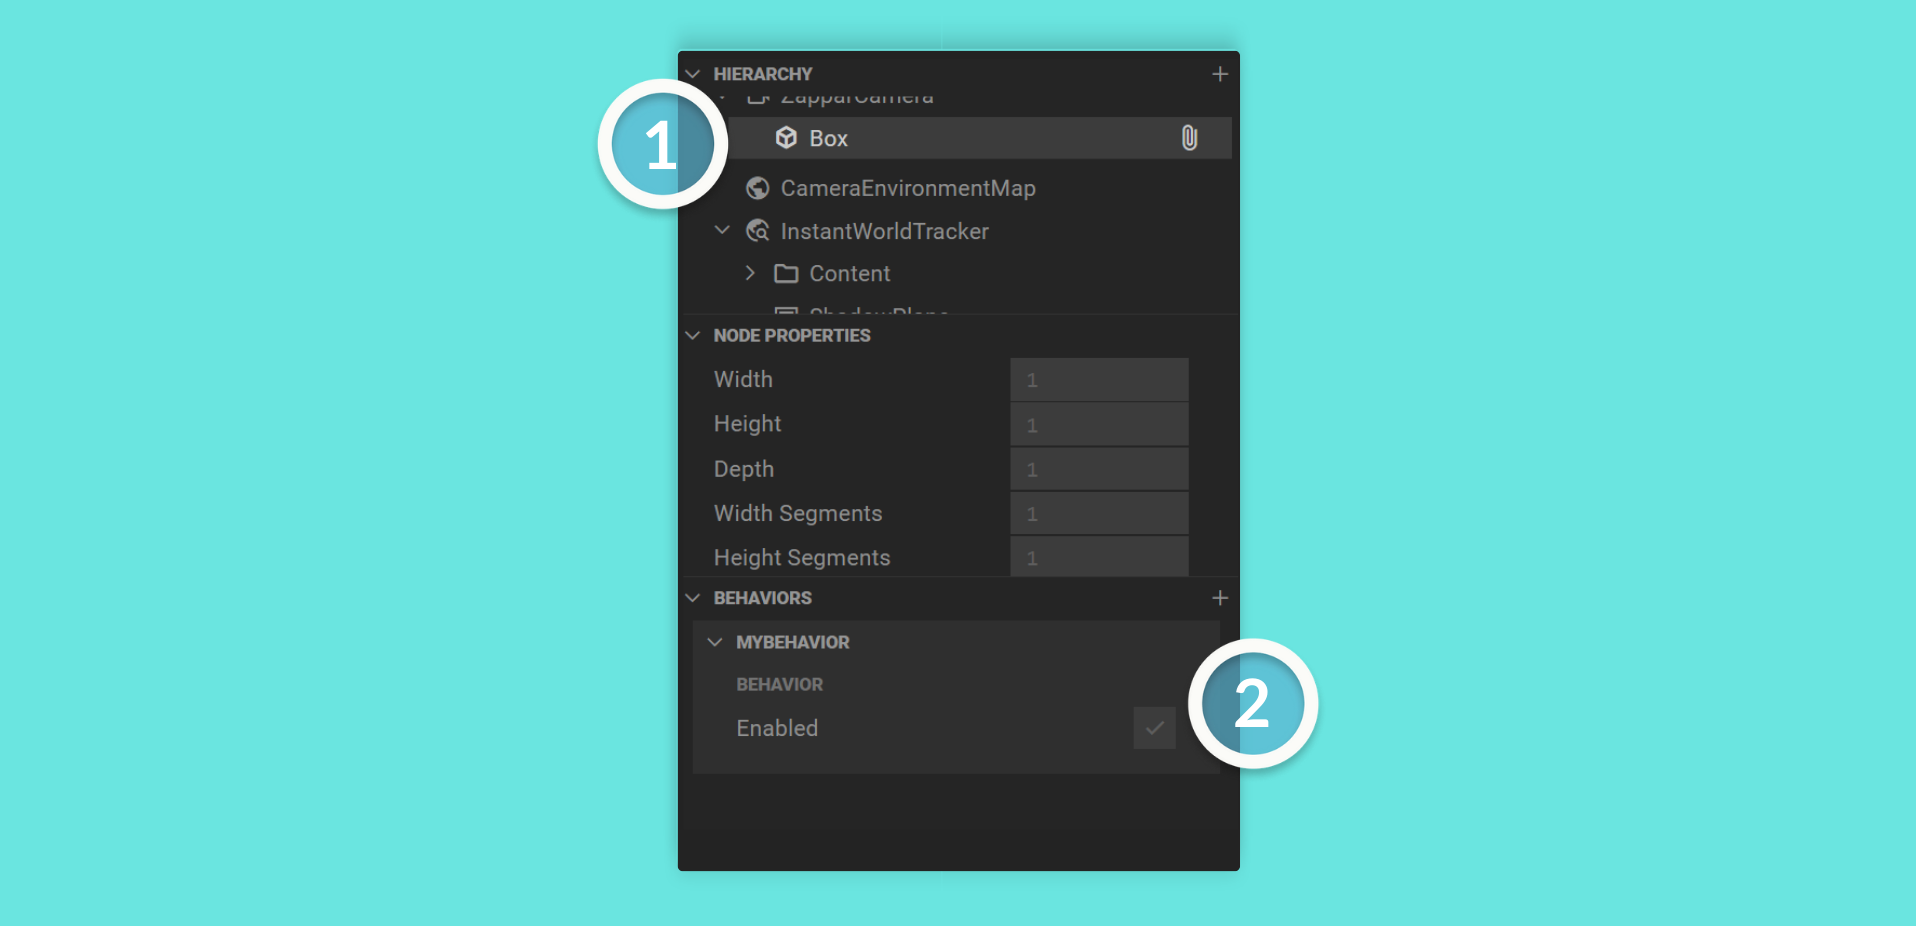
- Click on a node in the Hierarchy
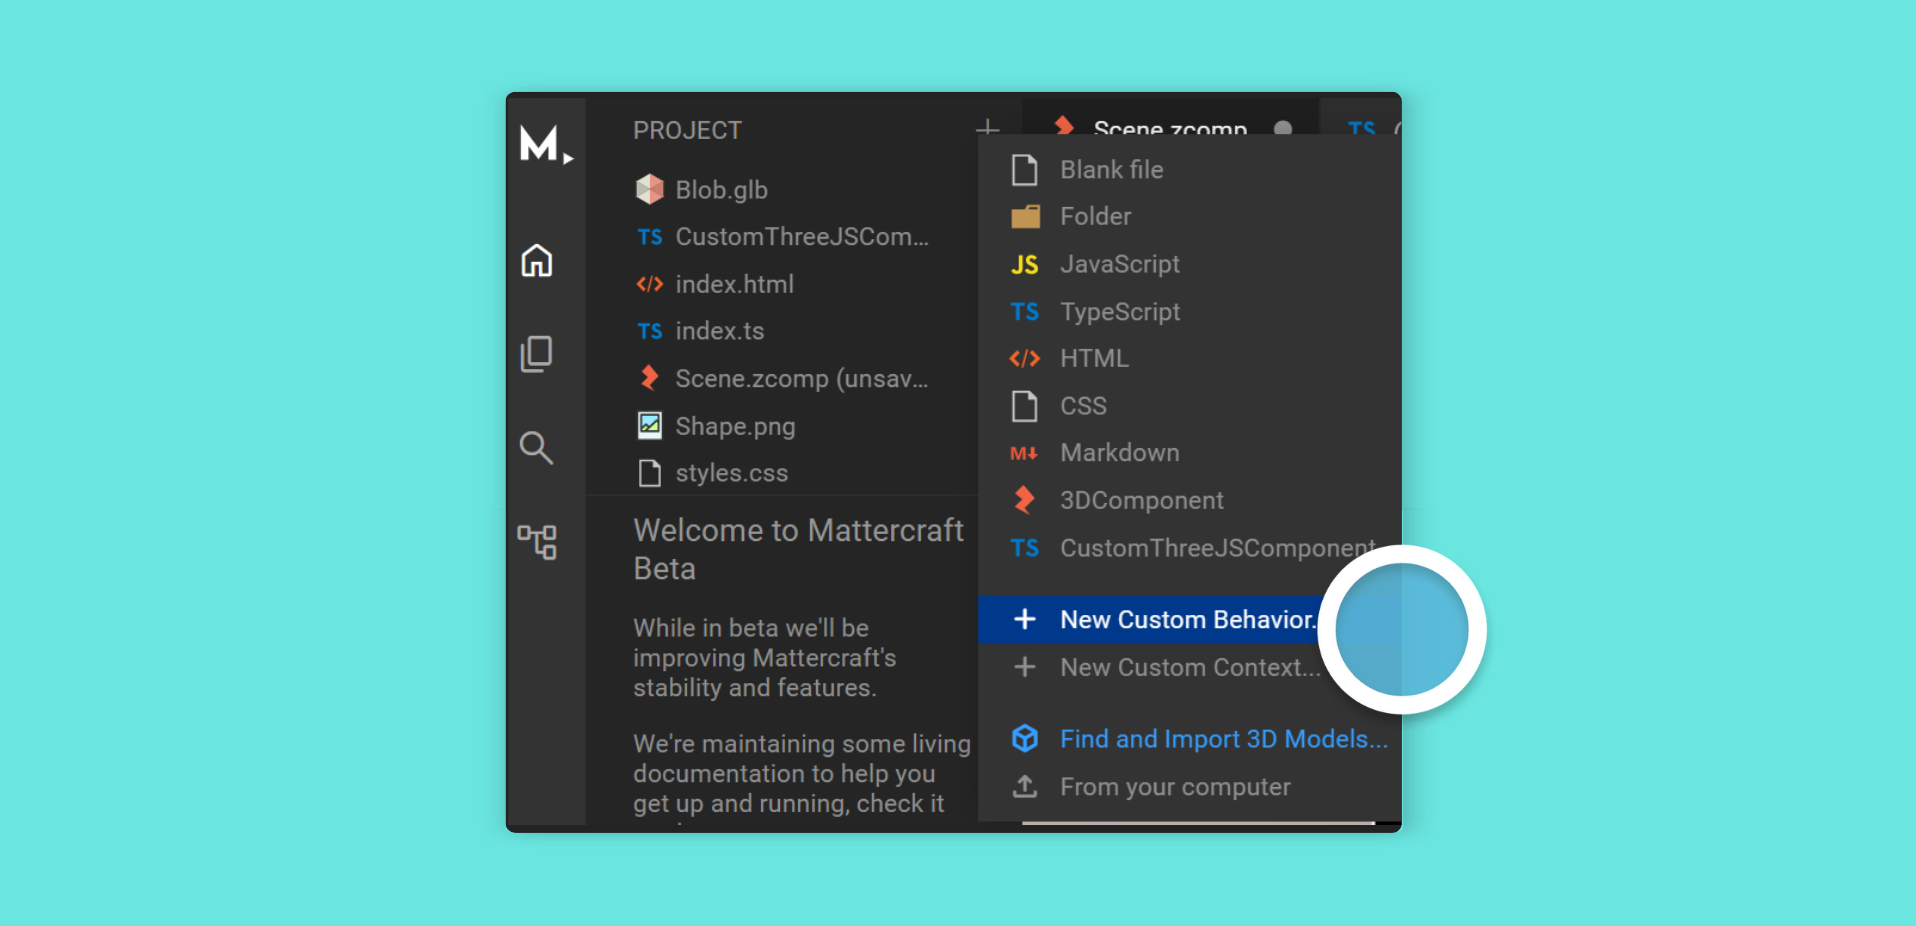
- Click the + (plus) icon button on its Behaviors Panel and Click + New Custom Behavior
- Type a name for the behavior then click Create
- The Project Panel will now have this behavior script file with the skeleton of a brand new behavior
You can also add a new custom behavior from the Project Panel and then specify which nodes you want it to affect.
Understanding Custom Behavior Structure
Section titled “Understanding Custom Behavior Structure”Let’s look at the basic structure of a behavior:
import { Behavior, ContextManager, zBehavior } from '@zcomponent/core';import { Box } from '@zcomponent/three/lib/components/meshes/Box';import Scene from './Scene.zcomp';
@zBehavior({ icon: 'favorite' })export class MyBehavior extends Behavior<Box> {
  protected zcomponent = this.getZComponentInstance(Scene);
  constructor(contextManager: ContextManager, instance: Box, protected constructorProps: {}) {    super(contextManager, instance);
    // Behavior events/script goes here
  }
  dispose() {    // Clean up any resources    // ...    return super.dispose();  }}
Behaviors are JavaScript or TypeScript classes that extend the Behavior base class provided by Mattercraft. When your experience runs, an instance of the class is constructed for each node that it’s attached to in the Mattercraft 3D editor.
See Mattercraft’s full API documentation here.
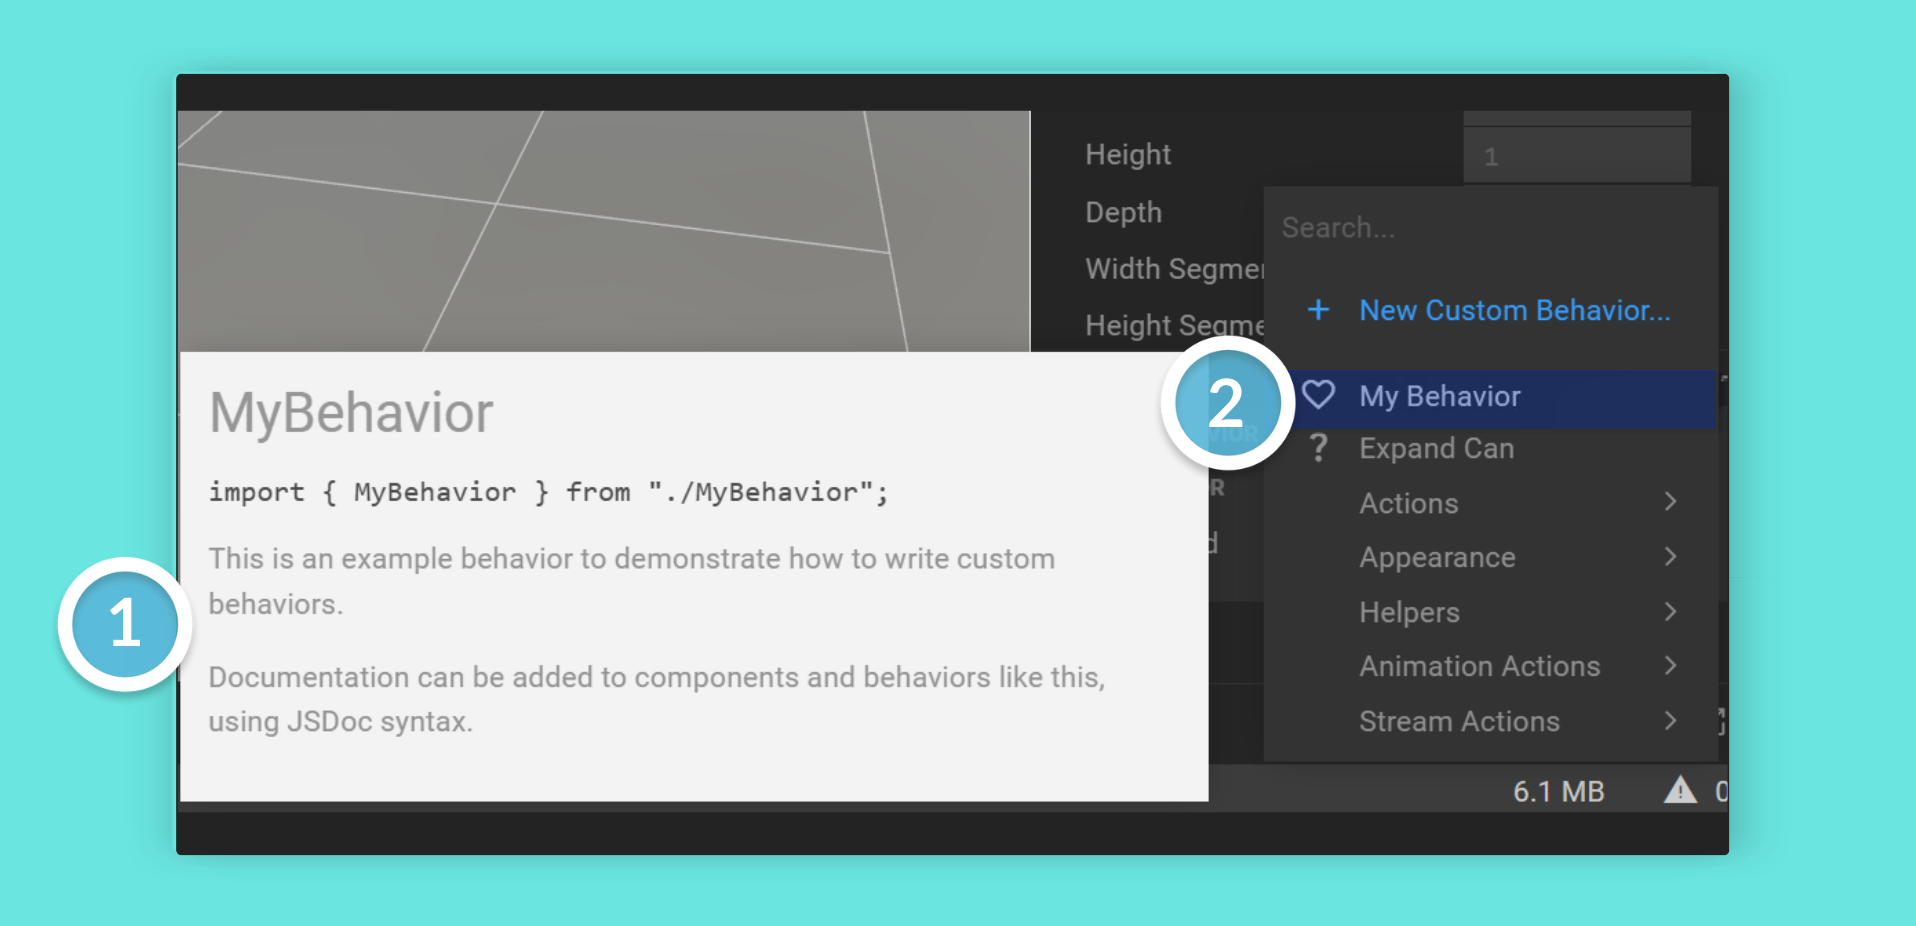
Just above the class definition, the @zBehavior() decorator tells the Mattercraft editor that you’d like this behavior to appear in the menu accessed by the + (plus) icon within the Behaviors Panel + (plus) menu and thus make it easy to add to other nodes in your experience.
To run your behavior at design time (in the Mattercraft editor), add runAtDesignTime: true to the decorator options:
@zBehavior({ icon: 'favorite', runAtDesignTime: true })export class MyBehavior extends Behavior<Box> { // ...}Using Custom Behaviors
Section titled “Using Custom Behaviors”Creating an Instance
When your behavior runs, it’s passed a reference to the node in the Hierarchy that it’s attached to.
In the example above, we created our behavior and attached it directly to a Box node in our 3D scene. As a result, the instance variable in our MyBehavior class constructor points to a Box component.
With the instance variable, we can access the node to change its properties or to call any functions. For example, to change the position of our box, we can set the value of its position prop:
@zBehavior({ icon: 'favorite' })export class MyBehavior extends Behavior<Box> {  constructor(contextManager: ContextManager, instance: Box, protected constructorProps: {}) {    super(contextManager, instance);
    // Change the position of this node (this.instance) by    // programatically entering it's x, y and z position values    this.instance.position.value = [1, 2, 3];
  }}
It’s also possible to access the underlying three.js object that the component exposes (in this case, a THREE.Mesh), using the .element value:
@zBehavior({ icon: 'favorite' })export class MyBehavior extends Behavior<Box> {  constructor(contextManager: ContextManager, instance: Box, protected constructorProps: {}) {    super(contextManager, instance);
    // Targeting a THREE.Mesh object with    // this.instance.element    this.instance.element.visible = true;
  }}
Events
Many components emit events, such as when a user taps or clicks on them, and behaviors can listen for those events. You can use the @zRegister() decorator to listen to events:
import { Behavior, zBehavior, zRegister } from '@zcomponent/core';
@zBehavior({ icon: 'favorite' })export class MyBehavior extends Behavior<Box> {  // Listen to the onClick event from the node this behavior is attached to  @zRegister('onClick')  private _handleClick() {    // Write something to the console when this node    // was clicked or tapped on    console.log('The box was clicked!');  }}
Alternatively, you can use the register function in the constructor:
@zBehavior({ icon: 'favorite' })export class MyBehavior extends Behavior<Box> {  constructor(contextManager: ContextManager, instance: Box, protected constructorProps: {}) {    super(contextManager, instance);
    this.register(this.instance.onClick, evt => {      console.log('The box was clicked!');    });  }}
The register function makes sure that your handler function is called every time the event fires and also ensures that your function is correctly disposed of when the behavior is destroyed.
Accessing other Nodes in the Scene
Section titled “Accessing other Nodes in the Scene”Sometimes, in addition to accessing the node instance that a behavior is attached to, you need to access the other elements in the scene, such as other Nodes, States or Timelines.
For example, you may have a button that you want to use to trigger animations, states, or any other action on multiple nodes.
The this.zcomponent variable lets you accomplish this. To reference a different node, you can use its nodes property, like this:
@zBehavior({ icon: 'favorite' })export class MyBehavior extends Behavior<Box> {  protected zcomponent = this.getZComponentInstance(Scene);
  constructor(contextManager: ContextManager, instance: Box, protected constructorProps: {}) {    super(contextManager, instance);
    // Make the PerspectiveCamera the currently active camera in the scene    // by searching for it with this.zcomponent.nodes    this.zcomponent.nodes.PerspectiveCamera.activate();
  }}
Or to play a timeline from the Animations Panel:
@zBehavior({ icon: 'favorite' })export class MyBehavior extends Behavior<Box> {  protected zcomponent = this.getZComponentInstance(Scene);
  constructor(contextManager: ContextManager, instance: Box, protected constructorProps: {}) {    super(contextManager, instance);
    // Play Timeline_1 from Layer_1    // by searching for it with this.zcomponent.animation    this.zcomponent.animation.layers.Layer_1.clips.Timeline_1.play();
  }}
In both cases, Mattercraft’s built-in autocomplete should help you find the node or animation you’re looking for in your scene.
If you have your script file open side-by-side with your scene, you can also drag nodes, states and timelines from the scene tab into your script to automatically create a reference to that object.
Properties
Section titled “Properties”Just as with custom components, you can add properties to your behaviors that can be controlled from the 3D editor.
For more information about controlling properties, see our dedicated Properties article.
The Frame Loop
Section titled “The Frame Loop”When 3D experiences run in an end user’s browser, the 3D engine will draw, or ’render’, the 3D scene up to 60 times every second. You may wish to run a script before each render frame, perhaps to implement your custom animation, or to perform any of your node transformations.
Use the @zOnBeforeRender() decorator to run code every frame:
import { Behavior, zBehavior, zOnBeforeRender } from '@zcomponent/core';
@zBehavior({ icon: 'favorite' })export class MyBehavior extends Behavior<Box> {  @zOnBeforeRender()  private _update(deltaTime: number) {    // deltaTime is the number of milliseconds since the last frame    this.instance.element.rotation.y += 0.001 * deltaTime;  }}
For a full example, see our dedicated The Frame Loop article.
Customizing Your Behavior’s Icon
Section titled “Customizing Your Behavior’s Icon”Use the icon option in @zBehavior() to set an icon for your behavior in the Behaviors Panel. Any icon from Google’s Material Icon Set can be used - just lowercase the name and replace spaces with underscores.
@zBehavior({ icon: 'favorite' })export class MyBehavior extends Behavior<Box> { // ...}For example, the Google Material icon Check Box becomes
check_boxin Mattercraft.
Grouping Behaviors
Section titled “Grouping Behaviors”Use the group option in @zBehavior() to specify which category your behavior appears under in the Behaviors Panel’s add menu.
@zBehavior({ icon: 'school', group: 'LMS API Client' })export class CourseCompletion extends Behavior<Box> { // ...}Restricting Parent Nodes
Section titled “Restricting Parent Nodes”Use the parents option to limit which nodes your behavior can be attached to. This accepts glob patterns matching component tags.
@zBehavior({ icon: 'back_hand', parents: ['three/Object3D/GLTF'] })export class ApplyXRHandRig extends Behavior<GLTF> { // This behavior can only be attached to GLTF nodes}